Project Source™ Vinyl Utility Window
This article contains affiliate links, and any purchases made through those links may result in a small commission.
The Project Source vinyl utility window from Lowes is an inexpensive vinyl window that's perfect for garages, sheds, mudrooms, and even chicken coops. It has a built-in screen, a window lock, and is easy to install.
Project Source window instructions
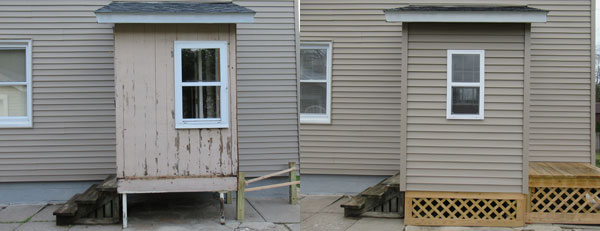
The Project Source window doesn't come with any instructions or hardware. The label had the actual size marked as 17.5" x 35.5", but it was closer to 17.75" x 35.75". The recommended rough opening of 18" x 36" worked, but you may need more than the 1/4" space depending on whether it will be finished on the inside. The image below shows a before and after view. The old window is on the left, and the newly installed utility window is on the right.
Project Source window installation
The Project Source window gets installed the same as any other flanged vinyl window. Check the opening for level and square and find the low point. Test fit the window before caulking the flange to avoid any miscalculation surprises. Once the window is caulked and in pressed into the rough opening, put a screw in the low point, plumb the window, and put a screw in the opposite corner.
Once the window is secured with the two screws, check the inside of the window for proper clearances. Shim or adjust if necessary, then install the rest of the screws in the outside flange. The window is small enough that you shouldn't need any help with the installation.
What type of screws for a vinyl utility window?
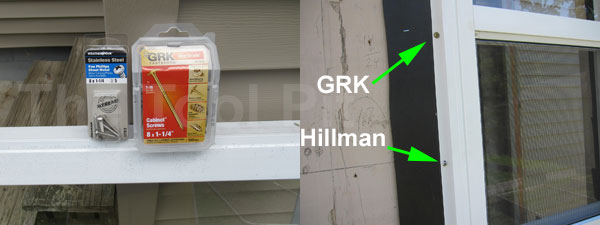
The Project Source window doesn't come with any hardware, but most vinyl windows are installed with panhead screws. A #8 screw should work, and the length will depend on the framing you're attaching the window to. We went right into the plywood and framing so a 1.25" screw was long enough. You'll need 12-15 screws for an 18" x 36" window.
We were going to use Hillman stainless steel screws , but went with the GRK screws instead because of the wider head. The image below shows the Hillman Weathermax and GRK screws on the left of the image, and the screws installed in the window on the right.
Weather-proofing the window
In addition to a thick bead of caulk on the inside flange, it's a good idea to add window flashing over the outside flange of the window before installing the finished siding, especially for those up in snow country.
The window's flange is a shy 3/4 deep, so T1-11 and vinyl siding will fit inside the flange, but j-channel won't. In the first image above, instead of wrapping the windows with j-channel, the vinyl siding went inside the flange because it gave the small window a cleaner appearance. Whichever material you choose for siding, window flashing offers another layer of protection. There are several well-known brands available on Amazon (3M, Cofair, WR Grace, etc). Here's a link to a roll of 3M (ad), and Cofair window flashing. They're both established brands so choose the best price.
Buying vinyl utility windows online
Lowes and Home Depot both carry the vinyl utility windows in several sizes and models including sliders, double hung, and hopper windows for basements. If you don't have a big-box store nearby, Amazon also sells utility windows but you need to read through the description to make sure you're getting the options you want as far as a screen, lock, or safety glass. For example, this window is made for mobile homes, but it doesn't have a lock. This shed window has safety glass and is smaller and less expensive.
Perfect window for small spaces
Even small garages or sheds benefit from natural light, and the vinyl utility windows are inexpensive and easy to install.